Applying DNS and Core Stabilization in Yoga

Several years ago when I was deep into Katy Bowman’s bio-mechanical approach to postures and movement I began to better understand some of the postural habits and faulty mechanics that were impacting my health and the health of my clients. It became clear to me that it was these habits and their frequent repetition while standing, sitting, squatting, bending forward and walking that lead directly to the manifestation of the chronic injuries and pain patterns that are epidemic in our modern lives. I also understood that if we were to overcome our injuries we needed to address them at their root cause by changing the way we move.

As this understanding came into focus, I started to take a closer look at the yoga postures I was doing and teaching and I had a realization. Those of us who do yoga tend to bring the very same postural patterns and poor mechanical habits we use in our daily lives into our practice of yoga postures. Therefore going to a yoga class often amounts to simply finding new and interesting ways to reinforce our patterns and promote our injuries.

This opinion is partly based on the fact that yogasana or the practice of yoga postures is extremely difficult. The posture themselves are for the most part so complicated and demanding that anything approaching mastery may arguably remain elusive for most. Yet it is also this degree of challenge posed by yogaasana which is the very thing that makes it potentially so powerful. If I manage to master even one posture I will have overcome much of my habituation, physically and mentally.

With the manifestation of this view I began changing my approach to practice and to teaching. I started introducing simpler postures that were more accessible and less physically demanding. I also began to emphasize the development of movement skills that could be applied not just to yoga but to the movements we do all day long. After all, what good is my trikonasana if I can’t bend forward properly to pick something up or squat down to use the toilet.

I then reintroduced some of the classical postures, not so much as postures to be mastered but rather as opportunities to apply the skills learned in the simpler postures to decidedly more challenging ones. The classical postures put the skills we learn in the simpler postures to a strong test, and they provide an opportunity to apply multiple skills at the same time. I liked this approach and still do, but until recently I felt there was something missing.

With the addition of my DNS training I feel I’ve found that missing piece. It’s the skill that integrates all of the other skills and organizes them into a cohesive whole. It’s the skill that transforms a set of applied skills, movements and stretches into a true asana – a posture that expresses both stability and ease. That skill is the skill of stabilizing the pelvis and trunk in a way that not only allows but in fact facilitates free movement. This skill is true “core stabilization.”

The DNS approach to core stabilization is not something I ever learned in a yoga class, but it applies to yoga wonderfully! I feel strongly that it’s a skill that has the power to transform any yoga practice. And for those who don’t practice yoga, proper core stabilization will improve whatever movement practice or sport they choose to do, not to mention greatly improve the movements they do outside of any structured class or activity.

I’ve begun to post a series of short videos in which I offer an approach to setting up some of the more common classical yoga postures. The videos also include some voiceover cues for guidance. My approach to each of these postures emphasizes core stabilization as the foundation for each. I don’t necessarily use the term “core stabilization” in the video, but hopefully as you watch these you’ll begin to understand what I mean when I say “stabilize” or “stabilize the pelvis” or “stabilize the lower trunk,” and you’ll begin to apply this in your own postures.

Before watching these videos I recommend watching the more basic DNS videos that are already posted. It’s important that you understand how to breath diaphragmatically and to establish intra-abdominal pressure before you can do the kind of core stabilization I am referring to in the post and in the asana videos. Just click on the links above to view those videos before moving on to the others.

If you’re new to yoga, these videos are not meant for you. They are intended for students will some experience. If you’re an experienced yoga practitioner or teacher, I ask that you keep an open mind. The feedback I’ve been getting these days from the experienced yogis that find their way into my classes is that I’m doing something very different from what they’ve been taught before. Hopefully this makes for a great reason to take an interest and see what might be of value and not a reason to reject it simply because it doesn’t sync with past experiences or understanding.

Whatever your view, my practice and my teaching have always been and always will be a work in progress. Therefore I welcome your comments and look forward to hearing from you and getting your feedback. No doubt your input will help me refine and improve my practice and my teaching moving forward.

Namaste’

Stabilizing the Lower Back for Back Bends

Over the last decade as I’ve been exploring different approaches to movement, I’ve always found myself coming back to my yoga practice asking the question “how does what I’ve learned inform my approach to yoga?” For the most part I’ve consistently found that new knowledge from different perspectives has facilitated greater insight into many classical yoga postures and, simply put, allowed me to perform many of these postures better and safer.

Because my personal practice and my teaching have placed greater and greater emphasis on postures that maintain a neutral spine, I must acknowledge that this approach has been at the expense of a great many important postures, arguably the postures that most distinguish yoga from other movement practices. The postures most conspicuously absent for a long time were “forward bends” and “back bends,” the two classifications of asana that involve deliberately moving the spine out of neutral and into flexion and extension respectively.

More recently, as I’ve begun to emphasis stabilization of the spine rather than neutrality, it has opened up my practice and teaching playbook to forward bends and back bends once again. And once again, I find I am understanding and performing these types of postures better than ever before, albeit with a bit of rust to work off. Back bends in particular have been a thrill to come back to and to perform with the ideal combination of safety and efficacy that I believe is essential to the practice of any asana.

One simple posture has laid the foundation for me to reintroduce more back bends into my practice and my classes. It is a posture that can be done by just about anyone, and I’ve even found it accessible to clients who are in acute back pain (although I wouldn’t recommend that someone in acute back pain use it without the help of an experienced instructor). This posture can be done on its own or used as an effective set up for any back bending asana. It is particularly useful for preparing the body and mind for prone back bends such as salabasana (locust), bhujangasana (cobra), urdhva mukha svanasana (upward facing dog) and dhanurasana (bow).

Take a look at the video above where I demonstrate the posture I call “3 Month’s Prone.” This video shows a limited view of the posture for the purpose of highlighting its key feature. For a somewhat more detailed video on this posture and a more complete view, refer to an earlier video I posted which you can find here.

As always, if you are uncertain of your ability to do such a posture, or if you have an injury to your spine, CONSULT YOUR DOCTOR BEFORE ATTEMPTING!


The Many Benefits of Orthopedic Massage

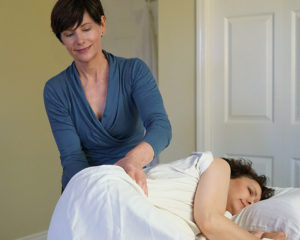
At Alignment Lab we feature a massage technique known as The Hendrickson Method of Massage and Manual Therapy. This technique was developed by Dr. Tom Hendrickson, D.C. and has its roots in physical therapy and osteopathy. When Tiffany and I originally received our training from Dr. Hendrickson he called his method “Orthopedic Massage,” and we have continued to use that moniker since its rebranding.

Orthopedic Massage (OM) is outstanding for breaking up tissue adhesions, increasing blood flow, reducing pain, and improving range of motion and functionality in muscles and joints. OM does all of these wonderful things for our bodies by employing 3 key components in its methodology. These components are wave mobilization, joint mobilization and the application of MET’s or muscle energy techniques.

Wave mobilization refers to the way that the massage strokes are given in OM. Specifically, the practitioner applies the strokes with a wave like motion in a direction that is perpendicular to the muscle fibers. This cross-friction movement, modeled after waves in the ocean, is relaxing to receive and to give. By staying more relaxed ourselves as we give the massage, our clients enjoy more of the benefits of wave mobilization. These include greater fluid uptake in muscles and tissues, improved blood flow and a calming effect on the nervous system.

While wave mobilization targets the muscles are nervous system, low speed joint mobilization, a second key component to OM, helps to reduce stiffness and swelling in joints by gently moving them during the massage. Joint mobilization also helps improve the muscle firing patterns that actively move a given joint and help with the client’s neurological awareness of his/her joint and it’s function. And joint mobilization, like wave mobilization, feels good to give and to receive!

Despite the many benefits of wave and joint mobilization, sometimes the neurological patterns in a person’s body are resistant to change. MET’s, a third key component of OM, are a safe, comfortable and relatively easy way of affecting these patterns by helping a clients muscles, nervous system and brain recognize and release dysfunctional muscle tensions that are persisting unnecessarily and contributing to pain and discomfort. MET’s can also help restore more functional muscle firing patterns and remove or reduce chronic stress on the joints.

Because OM can be done without the use of oils or lotion, it can be easily incorporated into a Personal Alignment Training session. As I’ve begun to include OM as a complement to the active training, I’ve seen pain reduction and improved function accelerate. This has reinforced for me why we’ve called our work Personal Alignment Training for Health (P.A.T.H.). While Personal Alignment Training can be applied for any purpose, including performance training, our ultimate goal with every client is a positive health related outcome.

Study Highlights Advantages of Movement Based Training

In 2015 several members of the kinesiology faculty at The Universe of Waterloo and The University of Toronto in Ontario, Canada performed a study using 52 firefighters comparing the impact of 2 different forms of fitness training to a control group. One group did 12 weeks of “movement-guided fitness” and the other did 12 weeks of “conventional fitness” training. The control group did no training at all.

Both groups that received training showed improved fitness over the control group, but the study found that the “movement-guided” (MOV) group showed greater joint stability in the knees and spine as compared to the “conventional fitness” (FIT) group. The study suggests that the the MOV group got results from the training that carried over to their work as firefighters, making them more effective and safer.

In a bit more detail, here are 3 important takeaways from this study:

1 – Practicing how to move with alignment in their training improved the quality of the firefighters movement outside the gym and made them more effective at their work.

The firefighters in this study depend upon their strength and agility to perform well. The firefighters who practiced exercises that emphasized correct alignment and movement based training improved their overall fitness in squats, lunges, pushing and pulling, and this improvement carried over into the tasks required in their work.

Most of us do not have as taxing a job as a firefighter, but at Alignment Lab we regularly see that improving the quality of movement directly contributes to improved function and greater longevity. How we stack our joints, having awareness of our body in space and improving the quality of our breathing are all key in having a healthy and strong body and mind.

2 – Firefighters who trained functional movement patterns (MOV group) had fewer injuries when compared to the traditional fitness exercises (FIT) group.

The fact that the firefighters who practiced a movement based training program had more control in frontal spinal and knee plane motions is huge! This means that the stress on their backs and knees was greatly reduced compared to the other firefighters doing both high-intensity training or no training. Reducing stresss on joints means less likelihood of wearing out joints and reducing the chances of a serious and potentially debilitating injury.

3 – Lower injury rate = Higher safety on the job

The improved performance and fewer injuries of the firefighters in the MOV group translates directly into improved safety on the job. This is by no means an insignificant outcome for someone who is employed in such a physically challenging and potentially dangerous line of work.

So what does this study mean for those of us who are not firefighters? Basically this:

*Movement based training produces the same fitness based results as conventional training but ALSO provides benefits that extend beyond the training environment.

*Movement based training regimens like the Personal Alignment Training we do at Alignment Lab train us not just to become good at specific exercises but also to become better at any movement based activity that we choose to do.

*Improvements in our movement come with less chance of injury and therefore less chance of down time when we’re not able to do the things we need to do or love to do.

This study highlights a central tenet of the approach we take to personal training at Alignment Lab, what we call Personal Alignment Training for Health or P.A.T.H.. P.A.T.H. emphasizes the quality of our movement over its intensity because we’ve found again and again that this approach leads to better health and more functional outcomes. Moreover, improving the quality of our movement while training with P.A.T.H. translates directly into desirable movement patterns in our everyday lives.

Flexibility vs. Mobility of the Hips

The first yoga class I ever took was a Bikram Yoga class at The Yoga College of India in North Beach San Francisco. It was a 6 pm class held in a heated room that followed a 4:30 class full of tired, sweaty bodies. The room was ridiculously hot and wet even before I’d even taken my first pose, and I’m certain that I have never struggled and sweat that much before or since.

Besides a sore back and a wounded ego, I came away from that class with the discovery that I was, in fact, pretty flexible. I had no idea I was capable of bending my body in the ways I did in my early days of taking yoga classes. Years later a client came to me who’d been taking Bikram Yoga classes and was recently diagnosed with a disc herniation. She told me that what she really enjoyed most about her experience in Bikram classes was the “noodly bendy” feeling. Her body was already very flexible and therefore being even more “bendy” was the last thing she needed, but I understood where she was coming from. Flexibility is desirable not just because it can be an indicator of good health, but also because it just plain feels good.

After suffering for several years with my own back issues I’ve come to see flexibility in a different way. It’s clear to me now that for myself and the many others who have or have had chronic pain, flexibility is part of the problem. At least the “bendy” kind of flexibility that lacks a stable foundation. People with bendy bodies are often drawn to yoga classes, especially Bikram or other “Hot” yoga classes because bendiness comes easy to them. It can be very challenging for these very “flexible” students to improve their stability doing yoga, and they often manifest injuries that begin to limit their mobility, sometimes dramatically so.

When my “noodly” client first came to me she could barley bend forward, despite her natural flexibility. As I helped her improve her mechanics she gradually became more stable and her mobility improved dramatically without the back pain returning.

When I work with a client who lacks flexibility, I try to help them find ways to improve their mobility rather than just giving them stretches to make them more flexible. It can feel good to be “flexible,” but ultimately it is the quality of our movement that counts. And that quality of movement depends a great deal on stabilization.

Stabilization means that I am able to maintain stability in one part of my body while I move another. If for example I am bending forward, I want to stabilize my spine so that I can generate more of the movement from my legs and hips. Stabilizing the spine is essential for increasing range of motion in the hips. Stabilizing the hips is essential for the long term health and function of these very important joints.

Stabilizing my hip joint requires that I stabilize the femur (thigh bone). This demands a good balance between the strength and responsiveness of my lateral hips and the flexibility and freedom of movement from my medial hip. If the muscles on my lateral hip don’t respond well to loads (ie-lack strength), the medial hip muscles will shorten and pull one femur toward the other. This can compromise the stability of the hip joint and will eventually damage it.

Conversely if I do have good balance between my later and medial hip then I am able to stabilize the femur effectively and this will allow for better mobility of my hip. Better hip mobility improves the health of the hip joint and greater stability through a larger range of motion.

I’ve found stabilizing the hip to be a very effective way to improve hip mobility and resolve hip related pain patterns. In my view mobility is the kind of flexibility we want. That is, not the “noodly bendy” kind but the kind that makes us stronger and affords us more range of motion and freer movement while minimizing wear and tear on our joints.

For a demonstration of one of my favorite posture for improving hip stabilization and mobility, check out this video.

Wall Plank

Tiffany teaches a wall plank in this video and talks about how it can be a useful tool for correcting dysfunction of the shoulder girdle.

Stair Mechanics – Walking Up

In this short video Tiffany details some of the most important features of functional mechanics when climbing stairs. This includes some of the most common mistakes and how to correct them.

High Lunge for Hip Stabilization and Mobilization

I’ve been really loving the short movement sequence shown in this video. It’s got a number of applications including stabilizing the hip joint, increasing range of motion in the hip, trunk stabilization and training for better throwing mechanics. I also find this sequence an ideal preparatory movement for classical standing asana in that it helps to awaken the movement patterns that really bring yogasana to life. Check it out!

STRENGTH TRAIN YOUR NERVOUS SYSTEM – Health and the Autonomic N.S.

Your autonomic nervous system is composed of two parts – the sympathetic and the parasympathetic nervous systems.  The sympathetic is the body’s accelerator or stimulator, increasing muscle contraction, heart rate and blood flow.  The parasympathetic is the resting aspect of this system and promotes muscular relaxation, slowing of the heart rate and relaxation of blood vessel walls.

When the autonomic nervous system is in “good shape” it transitions easily between these component systems and their functions  at the appropriate times. This ability to transition from the “fight or flight” response of the sympathetic N.S. and the “rest & digest” response of the parasympathetic is akin to a dimmer on a light switch that increases and intensifies the light when more light is needed to see and concentrate and then dials down the light, perhaps later that evening, for a romantic, candle light dinner.  Thus a well functioning autonomic N.S. gives us the ability to react quickly and forcefully to a dangerous situation at one moment, then relax and rest, maybe even take a quick nap and wake up refreshed a while later.

This aspect of our nervous system is called “autonomic” because its functions can operate without our having to think about them.  At the same time,  the autonomic  N.S. allows for a certain degree of conscious control. A great example of this is the role of the autonomic N.S. in respiration. We typically breathe without thinking about it,(thankfully) but we do have the ability to speed up or slow down our breathing at will and ideally with relative speed and ease. So despite the fact that many of our autonomic functions can occur unconsciously, we do have the ability to affect these functions consciously and therefore we can practice or “train” this part of our nervous system to perform its functions better.

A strong autonomic nervous system intelligently uses aspects of both the sympathetic and parasympathetic and is able to switch gears when needed without taxing the body.  We can consciously train our nervous system to seamlessly make this shift between stimulation and relaxation, and this will help keep our cardiovascular system strong and supple and facilitate muscle recovery. Thus “training” our autonomic N.S. not only improves the health of our nervous system but also the health of our muscles and cardiovascular system.

Most modern humans spend significant time  in situations and engaged in activities that stimulate the sympathetic nervous system to a mild degree.  This constant low-grade stimulation can become a habit, leading to missed cues that our body is neither resting nor fully engaged.  It’s as though we forget our light switch has a dimmer and leave the light on at the same brightness constantly, no matter the time of day or need for more or less light.

This “sympathetic overdrive” is also like a car running at idle, occasionally revving  the engine but never actually driving anywhere and never completely shutting off.  This can happen to all of us occasionally, and its not a big problem until it begins to manifest consistently when it will weaken our nervous system and its ability to shift from the sympathetic N.S. to the parasympathetic and it’s important functions.

Some signs of sympathetic overdrive include:

  • Digestive problems
  • Sleep problems
  • fatigue, exhaustion
  • shallow breathing
  • moodiness, anger, upset easily
  • high muscle tension
  • muscle pain
  • frequent colds or easily getting sick
  • metabolic disorders
  • high blood pressure
  • blood vessel problems

To train your nervous system to be adaptable and functioning optimally, here are some key steps:

1) Breathe diaphragmatically all the time

Diaphragmatic breathing is the easiest way to turn on the parasympathetic response. When you breathe well, your shoulders relax, your whole abdominal wall gently expands 360 degrees and there is a slight pause between the inhale and exhale.

Signs of breathing dysfunction include:

  • Spending your day sitting with a rounded back
  • Lifting your chest or shoulders up while inhaling
  • A chronically stiff and tight upper back
  • Breathing in and out of your mouth
  • Yawning or sighing frequently
  • A resting respiration rate higher than 12 breathes a minute

Your diaphragm is one of your largest back muscles.  In order to draw air into the deepest part of the lungs, it has to contract during inhalation. This contraction is a downward movement and in order for it to move down, the abdominal wall has to expand.  This is virtually impossible to do if you are slouching.  Conversely, correcting a slouch with a military style posture of arching the back and pulling the shoulder blades together will also restrict the movement of the diaphragm and interfere with breathing.

See our earlier blog post on diaphragmatic breathing for more on this subject.

2) Learn to relax the body

Our muscles are designed to do two things very well- contract and relax. Consciously relaxing our muscles helps them to contract more easily.  A muscle that forgets to relax is more prone to strain, pain and adds to overall discomfort in the body. Training your muscles to relax is just as important as doing your daily workout at the gym.

Some techniques that help include:

  • massage
  • yoga
  • tai chi / chi gung
  • biofeedback
  • meditation
  • warm baths.

Try giving yourself permission to relax and rest in small chunks throughout the day. Also, check out this video showing a great way of relaxing the psoas muscle. It will help you remember how to let go of tension in the body and the nervous system.

3) Learn to relax the mind

The workings of the mind distract us from being in our body and hence being able to perceive the habits that contribute to sympathetic over-stimulation. Habits like holding our breath, tensing parts of our bodies, straining our eyes and getting frustrated with little things often manifest as result of tension in the mind. Taking a few minutes every day to let the mind relax is renewing and refreshing to the body.

My favorite way to do this is to sit or lie down in a quiet area, scan through my body to note areas of tension, visualize the tension melting with the image of sunlight and then letting my mind be free. Letting the mind be free is as simple as giving permission for your thoughts be free of any particular focus.

4) Exercise on a regular basis with a large variety of challenges.

Your exercise should be varied and daily.  Each day should include walking, weight resistance, stretches and movements that challenge your balance and your movement skills.  The more muscles you use, the more blood flow you will have and this increased blood flow will feed nerves and removes waste products from all of your tissues. Stimulating the nerves meanwhile builds their resilience and adaptability.

*Personal Alignment Training is ideal for training the nervous system along with muscles, bones, joints and the C.V. system!

5) Get deep rest

How many times have you felt ready for bed at 8pm but for various reasons, ignore the signals?

Try this experiment once a week:

Forgo TV after dinner and read something relaxing, like a good book (not the news). Dim the lights in your home after the sun sets. Adjust the light so its just bright enough to read. Put away your phone and computer- you can check them in the in the morning. Notice when your body starts to send the signals it is ready for bed (not the mind!).

Place no significance on the time…

Just go to bed…

…and notice how much more rested you feel the next day!

If you have ever been camping you are likely familiar with this type of letting go.

6) Spend time in nature

Being outdoors is very soothing to the nervous system.  Exposure to the natural colors of blue and green have been shown to calm to our sensory nerves.

Try getting outdoors more on your lunch break.

Or instead of going to the gym, do a hike instead.  Exercising outdoors will engage the nervous system differently than an indoor workout with all of its distractions.

7) Be mindful of the quantity of stimulants you are consuming

Caffeine causes your blood vessels to restrict which can result in more muscular tension. Coffee and tea are delicious and enjoyable but consuming more than 1-2 cups a day or having caffeine after lunch can interfere with your body’s ability to relax and get a good night’s sleep. For anyone struggling with sleep issues, I recommend slowly reducing your intake to 1 cup a day and perhaps switching to tea most days as it contains less caffeine and delivers it more gradually.

A well functioning autonomic N.S. is essential to our long term health and quality of life. These “training” tips will help you build a stronger, more resilient nervous system that will serve you now and for years to come!

Adaptation and the Psoas

When we’re faced with pain it’s easy to wonder, “why did this happen to me?” Seeking a cause for pain can be helpful, but only if we’re willing to consider the possibility that the pain is the result of how we’ve been using our body, or in many cases, not using it.

Human beings as a species have been successful on this planet largely due to our uncanny ability to adapt to our environment. Our bodies are extremely well adapted to the hunter gatherer lifestyle of our distant ancestors, for example, and like these ancestors we thrive on a wide variety of foods and the great number of human movements once required to collect them.

The breakneck pace of technology, however, has placed great demands on our ability to adapt to changes in diet and lifestyle. With very high calorie foods so easy to come by with so little physical effort, even relatively young people must all guard against diseases unheard of in the few hunter gatherer populations still remaining on this planet.

Perhaps the solution is getting more exercise, but this is highly debatable. The true purpose of exercise is to provide a substitute for the movement we’re not doing and the calories we’re not using in our increasingly technologically driven and sedentary modern lifestyle, but most of what we do for exercise these days reinforces the very lifestyle habits we’re already spending most of our days doing. Is sitting on a bike pedaling for an hour better than siting still in a chair? Maybe a bit, but it’s still sitting and can still contribute to many of the same health consequences.

In her 2015 book Don’t Just Sit There, Katy Bowman speaks to this issue when she says “the sitting itself isn’t really the problem, it is the repetitive use of a single position than makes us literally become ill in a litany of ways.” She goes on to give several examples including that “muscles will adapt to repetitive positioning by changing their cellular makeup, which in turn leads to less joint range of motion.”

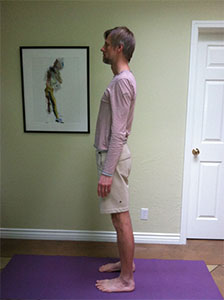
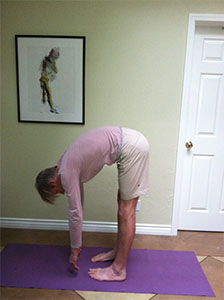
I find myself telling my clients and students constantly that muscles adapt to the position we put our bones in. For instance If I stand with my hip joints forward of my knees and ankles, my hamstrings and calve muscles will shorten, limiting my ability to bend forward from my hips and placing greater demands on muscles and joints in my lower back.

These “adaptive” changes manifest to a certain extent over a period of time, but in some cases this type of adaptation can be very quick, even instantaneous. In the hips forward misalignment described above, the affects on muscle length and range of motion can actually happen rather quickly. Standing with the hips pushed forward turns off the muscles in the posterior hip and lower back. This doesn’t take any time at all, it simply happens as a result of doing it.

This turning off of the hip muscles is also a kind of adaptation and I actually consider this good news for us modern humans. It demonstrates that our bodies have the ability to make some changes rather quickly and that these changes can just as easily be good for our health and function as bad.

My favorite example of soliciting a positive change in the body that can have huge benefits to our health and function is what happens in the Psoas Release. I use this posture as much as any I teach my students and clients because I’ve seen how effective it can be in retuning the psoas muscles to a more functional length. This is important as psoas that are too short have a huge impact on our health and function in a variety of ways.

The psoas muscles are rather large muscles that attaches to the inner, upper femur at one end and to a number of locations along the lumbar spine at the other. The psoas run through the pelvis but do not attach directly to it. The psoas do however have a big impact on the alignment of the pelvis as well as the alignment of the lumbar spine. One impact they can have on the pelvis is the very misalignment pattern described above – causing the hips (and the pelvis along with them) to sit forward of the knees and ankles and therefore shortened psoas can directly contribute to limited hip strength and limited hip range of motion.

Other possible effects of short psoas muscles are numerous. Here are a few more:

  • Compression of the lumbar discs
  • Excessive load on the sacroilliac joints
  • Increased risk of sciatica
  • Restriction of the diaphragm and disruption of healthy respiratory function
  • Inhibition of the pelvic floor tone
  • Increased risk of high blood pressure
  • Decreased circulation through the abdominal aorta
  • Impairment of the digestive system
  • Impairment of the urinary system
  • Impairment of the reproductive system
  • Ongoing activation of the sympathetic nervous system

Clearly there are a number of compelling reasons for have a longer, more functional psoas. So let’s look at the Psoas Release and learn a rather simple, gentle and effective way of bringing the psoas back to a more functional length. And did I mention that this pose can be very relaxing?